Search This Blog

Welcome to my blog

Tuesday, 15 May 2012

Giant Tissue Paper Stamp


Day two of the Jubilee Art Lesson plans bring you -Giant Tissue Paper Stamp
Key Skills: Shape, form and Texture


Materials: Picture of the Queen, pencil, rubber, PVA glue, cartridge paper, tissue paper

Vocab : Scrunch, texture, assemblage, collage, found materials


Learning Objectives :
To use an internet search engine to resource images
To create a textured portrait of the Queen using tissue paper (or other materials)
To learn about the relationship between lines, edges and spaces
To establish techniques of applying collage materials
To develop fine motor skills


Process
Step 1: Research on the internet to find a profile picture of the Queen. Ask children to draw a line drawing of the Queen onto a piece of A4 paper. For Key Stage 1 pupils you can find a template on the following website : http://www.ichild.co.uk/activities/view/1847/The-Queen-Collage

Step 2: Cut your chosen coloured tissue paper up into small squares


Step 3: Apply glue to one area of the portrait. If you place too much glue on the piece can become messy. It is much easier to work from one area at a time.

Step 4: Scrunch up the tissue paper into small balls and push firmly into the glue. Try not to leave any gaps.

Step 5: Continue with this technique until the section is completely full.

Step 6: Continue to work section to section changing the colours when necessary.

Step 7: Try to add areas of detail, such as the eye and eye brow. This can be done by scrunching up black tissue paper into very small pieces.

Step 8: Once you have completed all of the positive space that makes up the queens head, use a pair of decorative scissors to cut around your image. This will create the illusion of the edge of a stamp – don’t forget to add your price!

Differentiation:
Key stage 1: An alternative idea for Keystage 1 pupils could be to use paint. Place a few plates/trays with different colours in them and encourage the children to use their fingers to paint the inside of the printed Queens head. Try to encourage the children to stay within the lines and vary the choice of colour. Or use a projector to enlarge the picture and use bottle tops and plastic lids to fill in the portrait.

Key stage 2: Use a picture of the Queen to draw an outline of the Queens face. Think about what mediums you can use to fill the positive space. You could use sequins, buttons, tissue paper, badges, leaves etc. What other images could you apply this technique to for the Jubilee? Consider making a telephone box, black taxi, Tower of London, Big Ben or even the Olympic rings!

Don't forget to email me your images, lisamart@hotmail.co.uk the best ones, I'll place on my blog.

Monday, 14 May 2012

Mother's Mask

When I was studying for my degree my tutor gave me some of the best advice regarding my art work - she told me that my art should be about what I love, what I know and what speaks to me. This is probably the most personal piece of artwork I have created.
Last summer after a two year battle my mother was diagnosed with terminal mouth cancer. After undergoing some major surgery and radiotherapy my mother gave me her radiotherapy mask and asked me to make a piece of art from it. Initially I just sat and stared at the mask. I wanted to create a piece of work that spoke of my mothers battles, support, loss of identity, loss of voice, hope, love, courage, love of tea and the terrible disease that is cancer. How do you get all of that into one piece? And more importantly create a piece that motivates and encourages my mother to keep up the fight and not focus of the dreadfulness if this disease. I continued to just stare at the mask.
After a few conversations and fun day out with my mother I decided that I needed to get to work. I think my mother was beginning to think the mask had got buried in the studio and would not emerge again!!!
I decided I would make a piece that emphasised the key issues that I felt my mother was going through:
1. the loss of her voice- by this I don't mean literally, after several operations and the loss of half of her tongue my mothers speech is not as clear as it used to be. This can be just as frustrating for the family as it is for my mother - especially when you are out shopping and the shop assistant talks to you rather than respond to my mother when she asks for something. It is as though people assume that she has no cognitive functions, I cannot imagine how frustrating this must make my mother feel at times.
2. the disfigurement of the surgery
3. the amount of medication my mother has to take
4. the amazing battle and survival of four major operations - averaging around 7 hours each
5. the support from her family
6. my mother love of tea

This is what I have started to make. It is not quite finished as I have to make another part to complete the installation. I hope that this piece shows people how strong you can be, how amazing the human body is and how above all, if you have the love and support of some good people, how anything is possible.
The mask - this is the mask in it's raw state. My mother was screwed down to a table for ten minutes at a time wearing this whilst undergoing her  radiotherapy
Side view of the mask

Back view of the mask

I decided to collect the backs of my mother prescriptions and link these together to make a thread that I could weave with. I used these to weave the torso and face part of the mask. You can see snippets of the medication name, dosage, name etc as you look across the mask

The two side patches and two top head patches have been weaved with bright coloured thread, representing my mothers four children and the support that they offer.
The bright lights shining around

The medal denotes the dates of the four major operation my mother has undergone with the Blue mouth cancer ribbon hanging underneath

As a result of the operation my mother has to feed through a tube however one substance that my mother has been able to hang onto is her cup of tea. As a child I would buy scraps of fabric and old cloths from second hand markets and make toys, and objects out of then. I wanted the tea cup to reflect this activity - something that my mother encouraged.

The mouth is slightly to the side, denoting the disfigurement from the surgery with strands growing out from it. This is  "Lucifer" , which is the name my mother has given her tumour. The black line that goes around the face, mimics the scar that has been left from the surgery

All in all I have tried to make a piece that reflects some difficult issues but that also has a hidden beauty to it, a positive message and a sense of pride of how
incredibly brave my mother is.

At my husbands birthday I got to show my mother the progress of the mask. As you can imagine this was quite emotional, but I was just as pleased as I was shocked, when my mother picked the mask up and put it on.
This year my mother is taking part in the Race for Life for the third time. I cannot put into words how proud and inspired I am by her. Despite all of what she is going through she will be not only raising money but sharing in the hope, courage and inspiration of the thousands of people that will be taking part. Please take a moment and have a look at my mother's sponsor page, https://www.raceforlifesponsorme.org/susanhewett and if you can please donate, even if it can only be small amount. I know it would mean the world to my mother to know that she has raised money to support the fight against this awful disease. Thank you for taking the time to read this blog.

Jubilee Art - Queens’s face/vase picture


This week I will be blogging a different Jubilee Art Idea each day. I am trailing a new format to differentiate blogs about my work and workshop/educational ideas. I have included a full lesson plan with this blog, allowing teaching staff to print off and make full use of. I would be really interested in any feedback.
Here we go:

Key Skills: Shape, Form and Space


Materials: Picture of the Queen from a profile viewpoint, Pencil, Rubber, Colour pencils or pastels, cartridge paper
Vocab :
Parts of the upper body (shoulders and face), different names of line and shapes, words related to the exercise such as symmetry, upside-down, contour and sequencing language such as first, then, next etc

Learning Objectives :
To use an internet search engine to resource images
To learn how to draw symmetrical objects
To learn about the relationship between lines, edges and spaces
To establish techniques of applying colour
To develop skills of observation
To Increase their self-confidence in drawing


Process:
Step 1 – Find a picture of the Queen in profile, children can do this using the computers by carrying out a search on Google or the main school computer search engine. If you do not have access to a computer you could find a picture from a news paper, magazine or even a stamp.

Step 2 – Save the picture in a file on the computer and print off. If you have found your image from a magazine, newspaper etc, you could photocopy this to a workable size.

Step 3 – Using a pencil, draw a single contour line (outlining) the key facial points of the Queen.

Step 4 – Spend a few minutes observing the contour line of the Queens face you have drawn, look at the gap between the crown/hairline, hairline/eye socket, eye socket/nose etc.


Step 5 – Focusing on the contour line you have already drawn, aim to mirror the image using in a single line opposite your drawn line. Make sure that you are observing what you have drawn on the opposite site as you are drawing.

Step 6 – Using a curved line, draw a single line to join the top of the two side profile lines, repeat this at the bottom of the vase to complete the outline of your Queens head vase.


Step 7 – Draw a frame around the vase and add a shelf, table, platform for the vase to minimise the “floating” effect.


Step 8 – Shade in the opening of the vase to create the illusion of a 3D vase.


Step 9 – Fill in the vase with a Jubilee image, flag design, pattern, poem of the Jubilee or even collage materials – you are only limited by your imagination.


Step 10 – Cut around the square and mount on coloured paper to complete your vase/face picture. These have a great impact as part of a wall display.

Differentiation:
Key stage one – prepare a template for the children to draw around. Glue a picture of the Queen in profile onto a piece of good quality card. Allow this to dry and then cut out. Children can use the template to draw around to create one side of the vase. Gifted and talented children can try to mirror the face to create the vase. Alternatively children can be instructed to flip the template over to give the reverse image and draw around this. Children can then colour, write or draw in the vase to create a representation for the Jubilee.
Key Stage two– You could experiment with a young and older picture of the queen in profile. Work as instructed above but have the children draw one side of the vase from a picture of the queen during her coronation year and the other side of the vase from a picture of the Queen in 2012. Try to ensure that the key facial features are in line.

Let me know how you get on, please forward any pictures to lisamart@hotmail.co.uk 

Sunday, 13 May 2012

Victorian Art

Here's a quick blog on a lovely project I worked on recently. I was invited to work in a local Infant school for the afternoon with nursery to year 2 pupils to create some Victorian inspired art work. The order of the day included Zoe-tropes, love tokens and Pop up pictures. Here is how we got on.
First I worked with Year 2 pupils. They started by drawing a strip animation of an image that was slightly altered in each frame - a bit like a flick book.

Here are some of the amazing animations the children came up with

Once we had create out strips of animation we made a small handheld zoe-trope, which we pinned onto the end of a pencil with an eraser at the end. The children then twisted the pencil between their hands to watch their animation

With the year one pupils we made pop up pictures. The children started by making a couple of cuts into their card - This would produce the parts of the pop up to stick pictures onto

Next the children create images that could be used in the back ground and on the pop up sections. We looked at Victorian architecture for inspiration

The picture were glued to the cut out pop up frames

And voila a beautiful pop up picture. I love the pencil work in this piece, fantastic line work for such a young child

Finally with the nursery children we made love tokens. We learnt a little bit about the history of these. Then the children set to colouring the pictures in and gluing on some pre-cut shapes to their token

I think you'll agree these look fantastic, and we even managed a little literacy!

If you are interested in instruction sheets or templates for any of the above design, please email me at lisamart@hotmail.co.uk

Sunday, 6 May 2012

New Work - Cytherea

Finally I have managed to find the time to update my blog! 
This weekend I continued work on my `Cytherea' Painting. The canvas was primed with luminous pink paint with a wash of black acrylic once the pink was set.
For this painting I wanted to emphasise my love of texture and colour, using powerful complementaries and a range of textural finishes.

Purple underpainting completed
 The purple that I mixed up had a bit of translucency to it, I underpainted the dark areas on the canvas to allow a darker tone to be applied later.
Highlights added, working with the luminous pink underpainting
 The highlights add to the illusion of depth creating almost fold  like sections within the natural form image. My lines could have been a bit crisper and sharper. Something that I will have to work on for the next piece. You can see in the image above how the purple has applied a lot darker than the first image.
Power line dots added
 The dots represent a lot of different aspects for me and reference a couple of artists that I am influenced such as Chris O'Fili. I wanted the dot line to act as a power-play between the soft and dark tones to aid drawing the viewers eye around the piece.
Detail of dot work
I am not sure if this painting is finished yet. I am tempted to add more dots around the outer purple edge, but having stared at it for a few hours today I think it is best to come back to it with fresh eyes tomorrow!

Wednesday, 4 April 2012

Living Sculpture

Recently I had the pleasure of working with 10 Key Stage 1 gifted and talented pupil’s from a local school. The school has been taking part in the forest schools project that encourages and inspires individuals of any age through positive outdoor experience. The children attending the school have been visiting a local space at Wat Tyler and wanted to create a living sculpture that would be based at their school. The idea for the project stemmed from collecting natural form from around the school grounds through various mediums to create a sculpture. This would be a sculpture that would be designed by the children, constructed by the children and finally nurtured by the children.
So here's what we did.....
Rubbings collected from around the school
At the start of the project we walked around the grounds and used crayons to take rubbings from textured areas. We used our hands to feel whether the surface was smooth, rough, bumpy and then laid our paper over the top and took a rubbing using crayons. Children worked hard to collect as many patterns as they could, filling the whole paper.
Once we collected our rubbings we looked at the various patterns we had found. We then drew these onto a new piece of paper, making them bold and colourful.
    Patterns created from the rubbing collected from around the school grounds
    Children taking time to observe their natural form object and then drawing on paper
    Whilst we collected our rubbings we also collected items from the school ground that had fallen on the ground, such as twigs, leaves, feather etc. We took these objects inside and spent time talking and observing the shapes, colours, textures before completing an observational drawing of the object.
    Observational natural form drawing
    The children using watercolour to paint observational images of natural form on the canvas
    Working out where to place the photos taken by the children on the canvas
    Before we started work on our final sculpture we decided to create a  documentary canvas of all our findings. The children printed off photos they had taken, cut squares from their rubbings and natural form drawing and laid these out to complete a canvas. The children decided to use watercolour paint to paint images of natural form in the empty squares. The final touches included cut out of describing words of natural form pieces before gluing on twigs found around the school.
    The completed mixed media natural form canvas
    The winning design for our living sculpture
    The children designed the living sculpture after spending time exploring elements from their drawings, photographs, found objects and rubbings to create a natural form abstract drawing that encompassed patterns and details explored in one single image.
    The children chose a design they wanted to make from the final drawings which was of a boat form based on stones and leaves that had been found on the school grounds.
    Chicken wire frame covered with newspaper, having a mod roc layer applied
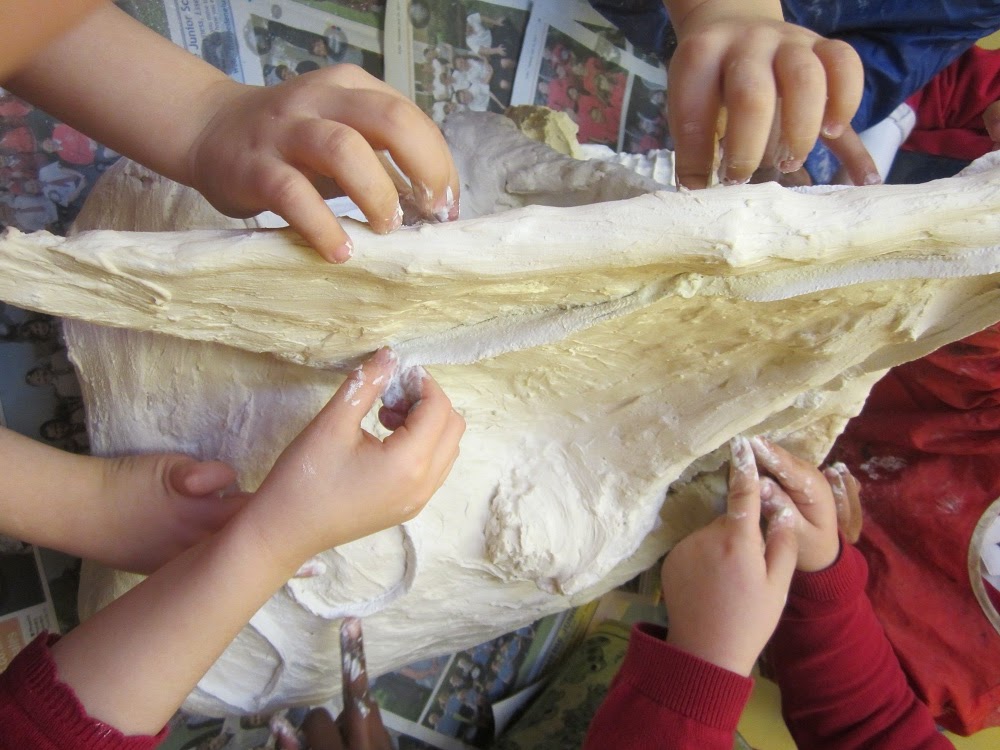
    Plaster being added to build up the sculpture form
    Painting our Sculpture
    The base of the sculpture was made using chicken wire which was then covered with newspaper. Children then applied modroc to the armature adding areas of details and areas for plants to be potted. Finally a layer of plaster was added over the tops for added strength.
    Once the sculpture was painted the children planted an arrangement of herbs and cactuses completing the living sculpture that the school community can nurture, observe and enjoy.
    Planting herbs in our sculpture
    Planting the cactus
    The finished sculpture
The Forest Schools has demonstrated success with children of all ages who visit the same local woodlands on a regular basis and through play, who have the opportunity to learn about the natural environment, how to handle risks and most importantly to use their own initiative to solve problems and co-operate with others. Forest School programmes run throughout the year, for about 36 weeks, going to the woods in all weathers (except for high winds). Children use full sized tools, play, learn boundaries of behaviour; both physical and social, establish and grow in confidence, self-esteem and become self motivated.
So Forest Schools will aim to develop:
  • Self Awareness
  • Self Regulation
  • Intrinsic motivation
  • Empathy
  • Good social communication skills
  • Independence
  • A positive mental attitude, self-esteem and confidence
To find out more about forest schools have a look on this website http://www.forestschools.com/index.php