Search This Blog

Welcome to my blog
Showing posts with label oil pastels. Show all posts

Thursday, 17 May 2012

Arty Queen Portrait


Day Three of the Jubilee art brings you a fun activity where children have the opportunity to research and learn about four different artists -Arty Queen Portrait
Key Skills: Shape,colour, form, research


Materials:Picture of the Queen, Images of Vincent Van Gogh, Roy Lichtenstein, PierMondrian and Gustav Klimt’s work, pencil, rubber, cartridge paper, medium towork in such as pencils, crayon or paint

Vocab : Boldcolour, texture, use of line, pattern, Great Masters, brush stroke


LearningObjectives :
To use an internet search engine to resource images
To learn about the work of the artists - VincentVan Gogh, Roy Lichtenstein, Pier Mondrian and Gustav Klimt
To apply knowledge of the artists work listed aboveto individual work
To develop drawing and painting skills
To complete a portrait of the Queen in the style offour different artists


Process:
Step 1: Research your artists. For my portrait I have decided to lookat the bold blocks of colour by Pier Mondrian, the dots and dashes of RoyLichtenstein, the wavy, subtle brush strokes of Vincent Van Gogh and thestunning pattern work in Gustav Klimt’s work.
Klimt's amazing pattern work

The pop art styling of Roy Lichtenstein

The bold colours of Mondrian
The amazing brushwork of Van Gogh

Step2: Once you have decided on your artists, you need to draw an outline of theQueens head. You could also try this technique with other London iconic imagessuch as the Beefeaters, ravens, lions etc.

Step 3: You need to decide which artists style youwant to apply to which part of the portrait. Once you have done this you areready to start.

Step 4: I have chosen to work in pastels and pencilfor my portrait but you can work in any medium for this project and on anysurface. You could use paint on a canvas, paint on wood or even create thepiece using felt material – you are only limited by your imagination and thematerials you have available.

Step5: I chose to start with Mondrian at the bottom of the portrait, colouring insections of bold colour using oil pastels.
  
Step 6: For the face of the Queen I decide to usethe dot work on Lichtenstein. I coloured in the bold sections with pastels andthe dots with pencil.

Step7: For the Queens hair I use oil pastels and pencils creating the wavy subtlelines that Vincent Van Gogh uses in his artwork. I have used three differentcolours to help create texture within the hair.
  
Step8: Finally, for the crown I decided to use the stunning glittering pattern workof Klimt. I looked carefully at the pattern work he used in his art work andreplicated shapes and patterns across the crown in pencil.


Step9: For a final touch I cut the excess from around the portrait and mounted theimage onto black card.
  
Differentiation:
Key Stage 1: For Key stage 1 pupils four artistsmay be a bit overwhelming. It might be more productive to limit this to one-twoartists
.
Key Stage 2: Key stage 2 pupils could select twoartists that they have researched for a couple of sections of the portrait. Forthe remaining two sections the children can come up with their own styles andpatterns. Once again think about what other images this can be applied to aswell as the Queens portrait.

Don't for get to send me your pictures and I will put the best ones on a blog lisamart@hotmatil.co.uk

Sunday, 29 January 2012

February BEA exhibition

I am very pleased to share with you 3 off my drawings that are currently on show at the BEA gallery in Basildon. My drawings reflect observations of places and happenings I have come across on various journeys. I use oil pastels and watersoluable crayons to create accessible images provoking the viewer to contemplate their own journeys, memories and thoughts of everyday life. I adore the quality of the mark you can get from watersoluable crayons on paper and next to glitter glue (oh yes you know who you are) has to be my favourite medium this year.
The three picture below were all inspired from a trip to Berlin last year.

 Brandenburg Gate Water-soluble Crayons on paper
 Bubble girl, Water-soluble crayon on paper
 Going nowhere, water-soluble crayon on paper
Drawings in situate at the BEA Gallery on Level 1, Eastgate Shopping Centre, Basildon.

Monday, 21 November 2011

Childrens Christmas Crafts no 1 - Reindeer Hand and Foot print

With Christmas rapidly approaching it is that time of year when parents, teachers, playgroup leaders and so forth spend time searching through the Internet and craft books to find suitable ideas for children- only to then have to work out how to adapt the craft for their specific age group. Well look no further. For the next 7 days I am going to blog a different craft activity each day and discuss how this can be differentiated for various age group.
Today's installment - Foot and hand print Reindeer's!!!
This hand print reindeer is a fun creative craft that is made from a child's footprint and hand prints. It is good way of discussing proportion and scale, looking at scissor skills as well as creating a nice addition to the memory box documenting your children when they are small. 
You will need, paper, 2 googly eyes (optional), Red pom pom/glitter or paint, Scissors, Glue, Crayons or paint
 The finished Design. I have been quite traditional in my colour choice however children may want to make their reindeer purple and pink with blue spots - this should be encouraged. it is so hard to encourage children to be creative when they are only given limited materials and colours to work with.

Take a rubbing of the bottom of a shoe, most children’s shoes have a really interesting patterns on them. You can do this by placing a piece of paper on top of the sole of the show and rubbing gently with a crayon or pencil. Make sure that children are either sitting down or take their shoes of to take rubbings rather than balancing in one foot - we don't want anyone falling over! Children could work in pairs for this activity.
 This is a completed rubbing from the bottom of a shoe
 
Trace around your hands on plain white paper. When drawing a picture or cutting out parts to be stuck together children often struggle with proportion and scale. If they use their hands and feet to create this piece it will be in proportion because they are, You can have some real fun playing around with this drawing around an adults hand and feet as well and mixing them with the smaller children's cut outs.
 Now have a look around the classroom for any interesting textures. Make sure that you encourage the children to feel the textures before taking a rubbing, discuss whether it is smooth, rough, bumpy - do you think it will work if you rub a crayon over the top? Fill the outline of the hand prints with rubbings of textured surfaces. I have used oil pastels to do this but you could use coloured pencils or crayons.

Carefully cut out your footprint and hand prints, for younger children an adult will have to do this part. Key stage one children that are working on their cutting skills should be encouraged to try to cut out the shapes

Glue the two hand prints (at the wrist portion) to the back of the footprint (up near the toes) to be the antlers.
Draw two eyes at the top of the head or you could glue two googly eyes. Finally for the nose you can either use glitter glue, as I have done for this example, Glue on a pom pom or paint on a red nose.

This is a good exercise for all age groups as there are alot of ways this can be adapted.
For young children, (or children that like getting messy) you

For Key stage one children you may need to help them draw around the shapes and cut them out before they collect rubbing. Children could also paint a design on the cut out pieces rather than collect rubbings.

Key stage two children will enjoy painting their hands and collecting rubbings as this provides an opportunity for them to explore art making techniques that they do not often get to use. If you wanted to give them something a bit more challenging they could collage the facial features by cutting out sections of colour from magazines and then glue these pieces on the reindeer.

This may be a bit young for Key stage three children, but they could adapt the piece and make it a little more abstract. Possible adding a hint of pop art style to the pieces. Alternatively they could cut out the sections and paint a Christmas scene on the surface using acrylic paint. Make sure that you use a good quality paper or card if you are going to apply paint.

Have fun and don't forget to email me any of your pictures of completed projects.


 can create this by painting your hands and feet and printing them onto paper rather than collecting rubbings. Be sure to have a bowl of water and towels on the stand by.

Thursday, 23 June 2011

Froth and Spoon

After such an inspirational week, I had an urge when I got in from work this evening to create a new drawing. All week I have been working with children getting them to concentrate on their mark making and explore the mediums they have been given to their full potential. I thought "Why am I not doing this in my practice". I am desperate to get my acrylics out and start creating some colour theory canvases, but feel I have not quite finished with oil pastels. As I have mentioned before I love the quality of the mark, the subtle blending and the strong colours in oil pastels. But how far can I push this medium?
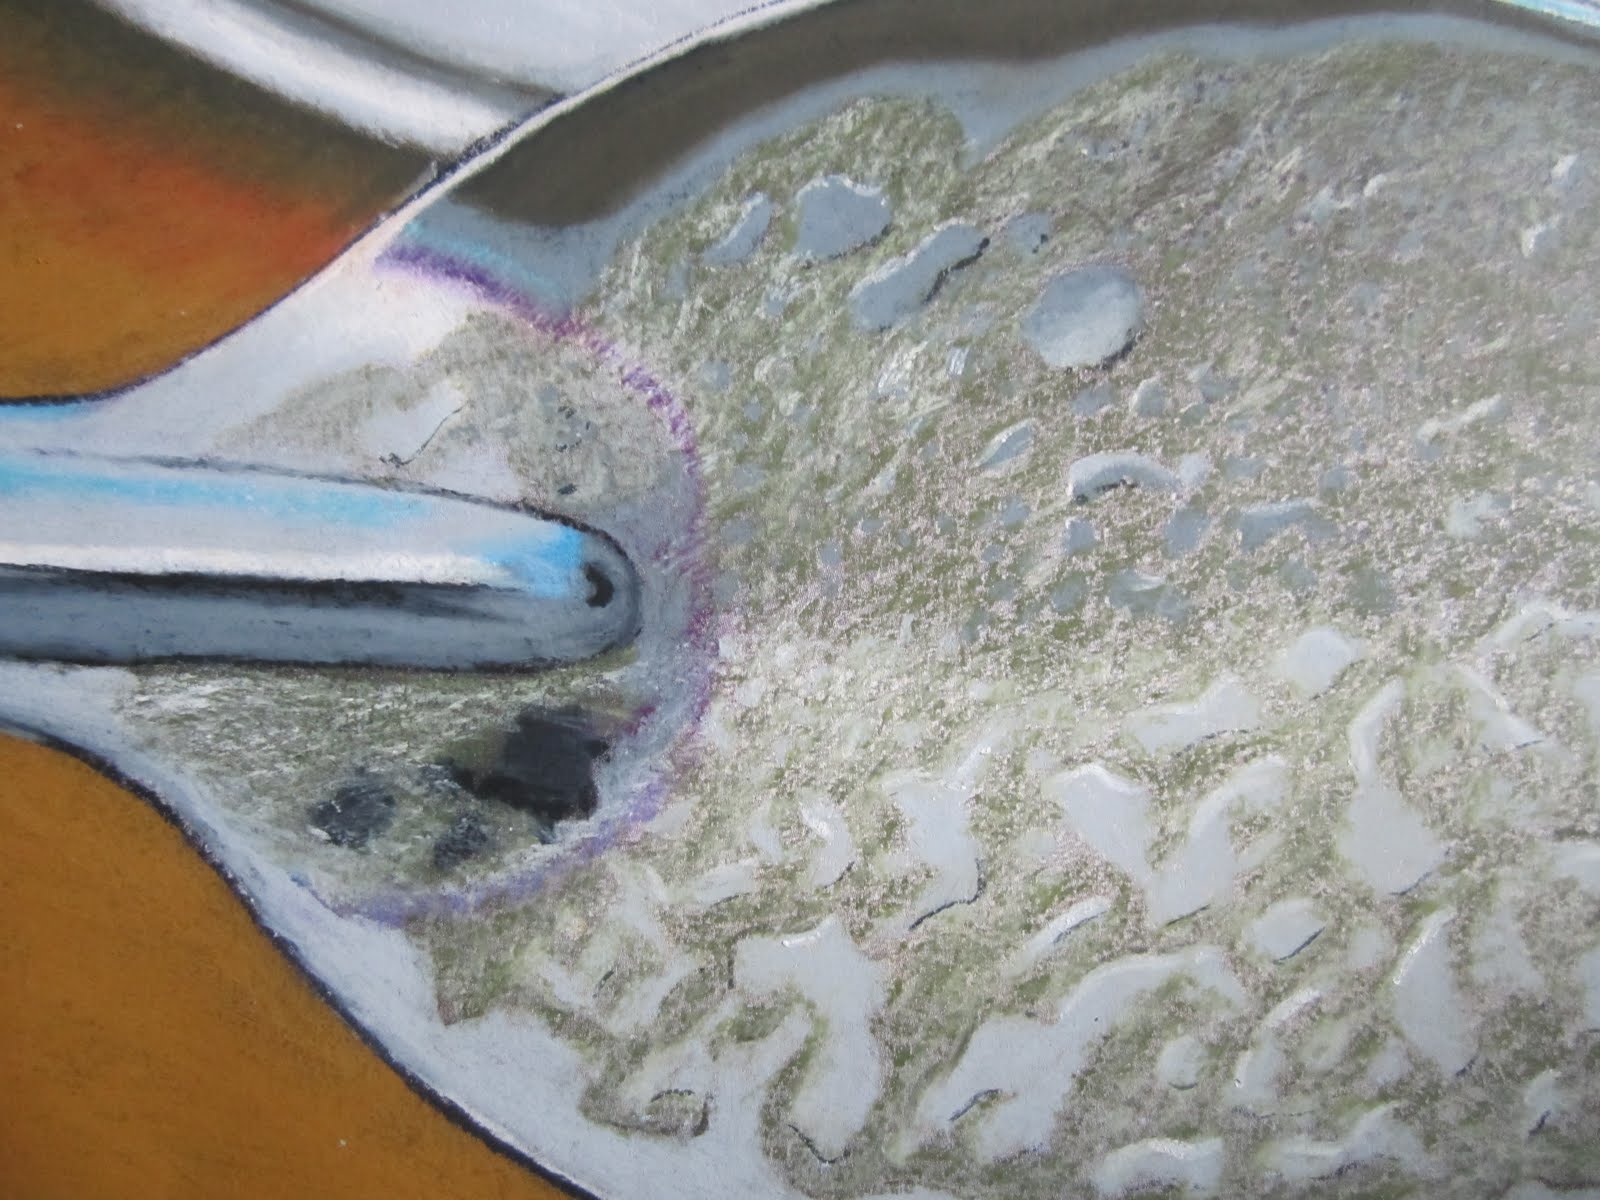
A few weeks ago I visited an English Heritage building with my husband. The first thing we do when we arrive is grab a coffee and cake (my God doesn't that make us sound old!). On this visit once I had stirred my coffee I was intrigued by the marks left on the spoon and took a photo - commenting that I would attack this as a painting in the near future. Well today was the day. Normally I layer a maximum of two colours when using oils as often it can lead to a smudgy nasty colour if you use more, I can be quite heavy handed with my medium as I like to feel the marks being made - for this piece I used my normal technique for the plate, the table and parts of the spoon but for the froth and highlights; in some areas I have `gently` layered up to four colour. I have found that this have allowed me to create great depth and contrast and well as interesting textures. Maybe the acrylics will have to wait a while.
I see this picture as almost a self portrait of my husband and myself - I will leave it up to you to decide who the spoon is and who the froth is!
Froth and Spoon
A close up showing the different colours used

Monday, 20 June 2011

Norwegian Sunset

Just finished this drawing using oil pastels of a gorgeous Norwegian sunset we watched whilst on holiday last December. I would normally use chalk pastels for a sunset as they are easier to blend with and found this was a real challenge. I don't think I have quite captured the slight movement of the water and the depth of colours in the sunset. I think it may be time to start getting the paint brushes out and creating some movement on canvas. As much as I enjoy working with Oil pastels, I also feel restricted by the limited colour palette available that cannot compete with the range of shades, tints and tones that can be mixed with paint.

Wednesday, 8 June 2011

Brandenburg Gate

In preparation for the Basildon Art Trail September 2011, I have been working on a series of drawings based on places I have visited. I have chosen to use pastels -  mainly oil pastels - as the medium for the drawings. I love the quality and marks that can be made with crayons and pastels, the lush colours, subtle blending and powerful contrasts.
In March my husband and I went to Berlin and visited the Brandenburg gate. I was inspired by the architecture and wanted to capture the mood and magnificence of the gate and atmosphere of the day in my drawing. As you can see I have used some artistic licence with my drawing `editing` the picture, removing all the buildings behind the gate and a few of the passerby's. This allows me to concentrate on capturing the form and line of in the architecture; playing with the negative space and using the signs and posts to lead the viewer around the picture. I enjoyed creating this drawing and hope that you find it interesting.
 Brandenburg Gate 2011, Oil Pastel
Photo of the Brandenburg Gate