Search This Blog

Welcome to my blog
Showing posts with label reindeer crafts. Show all posts

Sunday, 27 November 2011

Children's Christmas Crafts no 7 - Felt making

Today's post is the last in this weeks series of 7 craft ideas to do with children. This post will show you how to use wool balls to make a felt picture. For this activity children will have to contemplate design, use of colour, composition and function of the piece.
You will need: a bamboo mat, felt wool, tissue paper, a bowl of soapy water and embellishments such as glitter glue and thread
 Completed Felt picture of a reindeer
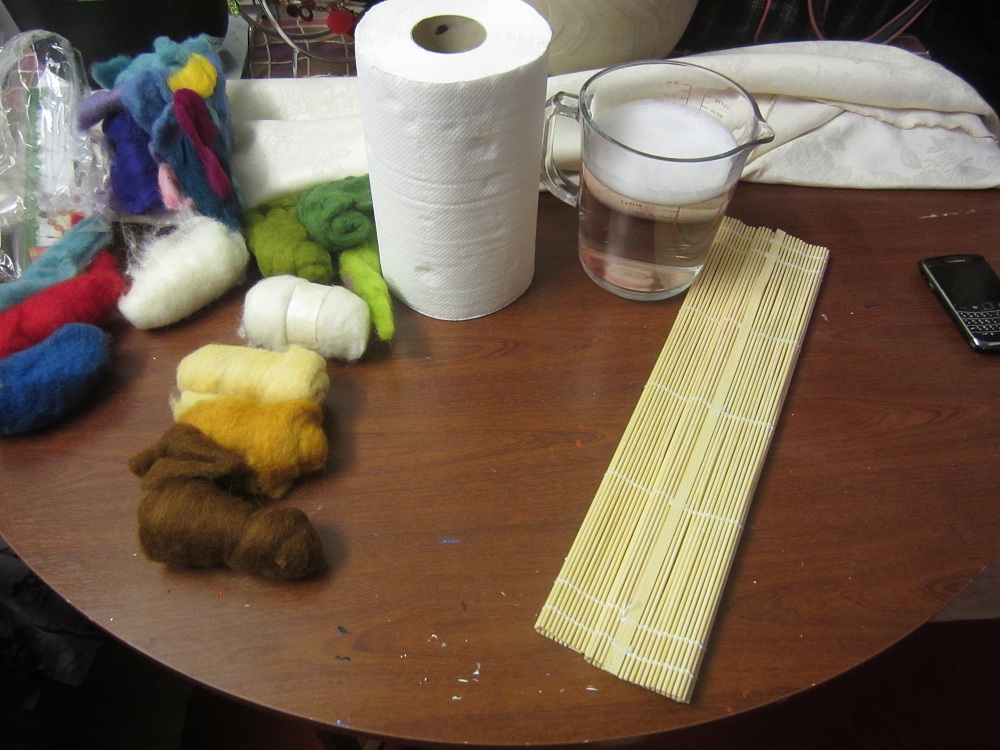
 1. Make sure you have a clear working area and have all your materials ready
 2. I would normally get the children to plan out their design on paper first. This provides children the opportunity to work out colour choices and composition. Once they have planned their design they are ready to start.
3. Lay a piece of tissue paper on the table ready to start adding your felt picture. Select your colour wool and gently tease the wool apart to create thin layers. Make sure you do not pull the felt too thin as this will leave gaps.
 4. Continue building up the picture by adding pieces of wool gently overlapping each piece
 5. Once you have completed your picture you are ready to bond the wool together to make your felt picture
 6. Place some tissue paper over the top of the felt picture, be careful not to move any parts (you can use net curtain instead of tissue paper which works better as tissue paper can tear if the children rub too hard). Very gently use you hand to dampen the tissue paper using a mixture of soapy water.
 7. Gently rub over the top of the tissue paper, the soapy mixture soaks into the fibres of the wool. when you rub over the top the mixture will sud up and start to bind the fibre together.
 8. When you have rubbed over the top and the felt has flattened you should be able to pick the piece up and turn it over. Make sure you are careful when turning the piece over as the fibres will not have completely bonded yet.
 9. Repeat the process on the back, lay some more tissue paper over the top and rub over the back of the felt picture. Remember to rub firmly but with care. The soapy mixture needs to mix into all the fibres for the piece to bind together to form your felt picture - this process can take up to ten minutes.
 10. Gently peel off the back layer of tissue paper to reveal your felt picture. The felt should stay on the remaining tissue paper, if it is attached to the piece of tissue you are pulling off then you need to continue rubbing the fibre together. Once you have taken the back layer of tissue paper off, lay the felt onto a bamboo mat.

 11. Peel off the remaining piece of tissue paper
 12. Roll the picture in the bamboo mat
 13. Roll the picture tightly in the mat, keep rolling and squeeze the bamboo mat as you are rolling. This squeezes the water from out of the felt material and finally binds all the fibres together. Keep unrolling the mat and then rolling it back up again until you have hardly any suds or water coming out. This should take 5-10 minutes
 14. When you have rolled the picture for about 10 minutes, take it out of the mat and leave it to dry for 24 hours
 15. Once the piece is dry it is time to embellish the piece. I have decided to embroider on the reindeer's antlers using cross stitch silks.
16. For a final touch I have used glitter glue for Rudolph's nose and spot on my reindeer's back. You could also add sequins, buttons, beads feather etc etc

This is a perfect activity to invite parents and carers into school to help out with. Key stage one children can design their picture on paper and then select the felt material. Young children should be able to tear off pieces of felt and lay then down to create their pictures. Parents can help with the binding and rolling part. A lovely activity for a fun Christmas craft afternoon.

Key stage 2 can think about what function the piece will have once it has been made. If it is going to be framed to create a wall hanging, sewn on a bag as a interest panel or even add a fabric stiffener and create a sculptural piece. Key Stage 2 children should be considering composition and use of colour throughout the making process.

Felt making workshops are available for schools clubs and organisations, if you are interested please contact me on lisamart@hotmail.co.uk

Monday, 21 November 2011

Childrens Christmas Crafts no 1 - Reindeer Hand and Foot print

With Christmas rapidly approaching it is that time of year when parents, teachers, playgroup leaders and so forth spend time searching through the Internet and craft books to find suitable ideas for children- only to then have to work out how to adapt the craft for their specific age group. Well look no further. For the next 7 days I am going to blog a different craft activity each day and discuss how this can be differentiated for various age group.
Today's installment - Foot and hand print Reindeer's!!!
This hand print reindeer is a fun creative craft that is made from a child's footprint and hand prints. It is good way of discussing proportion and scale, looking at scissor skills as well as creating a nice addition to the memory box documenting your children when they are small. 
You will need, paper, 2 googly eyes (optional), Red pom pom/glitter or paint, Scissors, Glue, Crayons or paint
 The finished Design. I have been quite traditional in my colour choice however children may want to make their reindeer purple and pink with blue spots - this should be encouraged. it is so hard to encourage children to be creative when they are only given limited materials and colours to work with.

Take a rubbing of the bottom of a shoe, most children’s shoes have a really interesting patterns on them. You can do this by placing a piece of paper on top of the sole of the show and rubbing gently with a crayon or pencil. Make sure that children are either sitting down or take their shoes of to take rubbings rather than balancing in one foot - we don't want anyone falling over! Children could work in pairs for this activity.
 This is a completed rubbing from the bottom of a shoe
 
Trace around your hands on plain white paper. When drawing a picture or cutting out parts to be stuck together children often struggle with proportion and scale. If they use their hands and feet to create this piece it will be in proportion because they are, You can have some real fun playing around with this drawing around an adults hand and feet as well and mixing them with the smaller children's cut outs.
 Now have a look around the classroom for any interesting textures. Make sure that you encourage the children to feel the textures before taking a rubbing, discuss whether it is smooth, rough, bumpy - do you think it will work if you rub a crayon over the top? Fill the outline of the hand prints with rubbings of textured surfaces. I have used oil pastels to do this but you could use coloured pencils or crayons.

Carefully cut out your footprint and hand prints, for younger children an adult will have to do this part. Key stage one children that are working on their cutting skills should be encouraged to try to cut out the shapes

Glue the two hand prints (at the wrist portion) to the back of the footprint (up near the toes) to be the antlers.
Draw two eyes at the top of the head or you could glue two googly eyes. Finally for the nose you can either use glitter glue, as I have done for this example, Glue on a pom pom or paint on a red nose.

This is a good exercise for all age groups as there are alot of ways this can be adapted.
For young children, (or children that like getting messy) you

For Key stage one children you may need to help them draw around the shapes and cut them out before they collect rubbing. Children could also paint a design on the cut out pieces rather than collect rubbings.

Key stage two children will enjoy painting their hands and collecting rubbings as this provides an opportunity for them to explore art making techniques that they do not often get to use. If you wanted to give them something a bit more challenging they could collage the facial features by cutting out sections of colour from magazines and then glue these pieces on the reindeer.

This may be a bit young for Key stage three children, but they could adapt the piece and make it a little more abstract. Possible adding a hint of pop art style to the pieces. Alternatively they could cut out the sections and paint a Christmas scene on the surface using acrylic paint. Make sure that you use a good quality paper or card if you are going to apply paint.

Have fun and don't forget to email me any of your pictures of completed projects.


 can create this by painting your hands and feet and printing them onto paper rather than collecting rubbings. Be sure to have a bowl of water and towels on the stand by.

Sunday, 20 November 2011

Christmas Crafts No 7 - Felt Tree Decorations

The final blog in this series of Christmas crafts is idea number 7 - Felt decorations. These are quite cute decorations that can be made to hang on the tree, strung together to make a unique banner or even used at gift tags for someone special.
To make these you will need:
Felt material of various colours, glitter glue, jingle bells, sewing thread, sewing needle, buttons and scissors.
 The complete set of felt Christmas Decorations
To start you will need to decide on what decoration you would like to make. Cut out all the pieces required to make your decoration. Once again I have not used a template but I did lay out all the pieces prior to sewing together and photographed them. You can print this picture off and make templates that you can use but cutting around the shapes and drawing them onto a piece of card. You can then cut the pieces out of the card and use these to draw around on your fabric. Alternatively you could cut the pieces out of funky foam and glue them together.
I have made all my decorations uniform so that they resembled a set of decorations. Each decoration has the same size house, snow on the roof and chimney, all character have a scarf and all the body parts are the same size.
Originally I planned to sew the bricks onto the houses as a bit of extra detail in the background. However when I placed the glitter glue around the snow on the roof and chimney, I really liked the effect. So I decided to glitter glue the bricks onto the felt house.
While the glue was drying I sewed together all the parts to make my character topper. Any detail that needed embroidering was completed first. This included sewing on the eyes, nose and any other facial features. The character was then sewn together systematically, feet first then up to the the arms, scarf and around the head.
When the glue was dry, I sewed the two parts of the house together adding the snow resting on the top of the roof and the chimney. Make sure you don't forget to add a piece of extra thread at the top of the decoration to enable you to hang your final piece onto your tree.
Finally the topper was sewn (or you could glue) in place and for a final detail a jingle bell was added to the bottom of the decoration.  I mainly used blanket stitch however changed to a running stitch for the facial features as I found the blanket stitch looked a bit messy. You can see the difference in the facial features of the Ginger bread man compared to the others.
If you are unsure of how to sew a blanket stitch you can follow the instruction on the following website  http://www.cutoutandkeep.net/projects/how_to_blanket_stitch  
See below for the final results.
 All the piece for all four decorations cut out ready to stitch together
 The completed "Snowman" decoration
 The completed "Reindeer" decoration
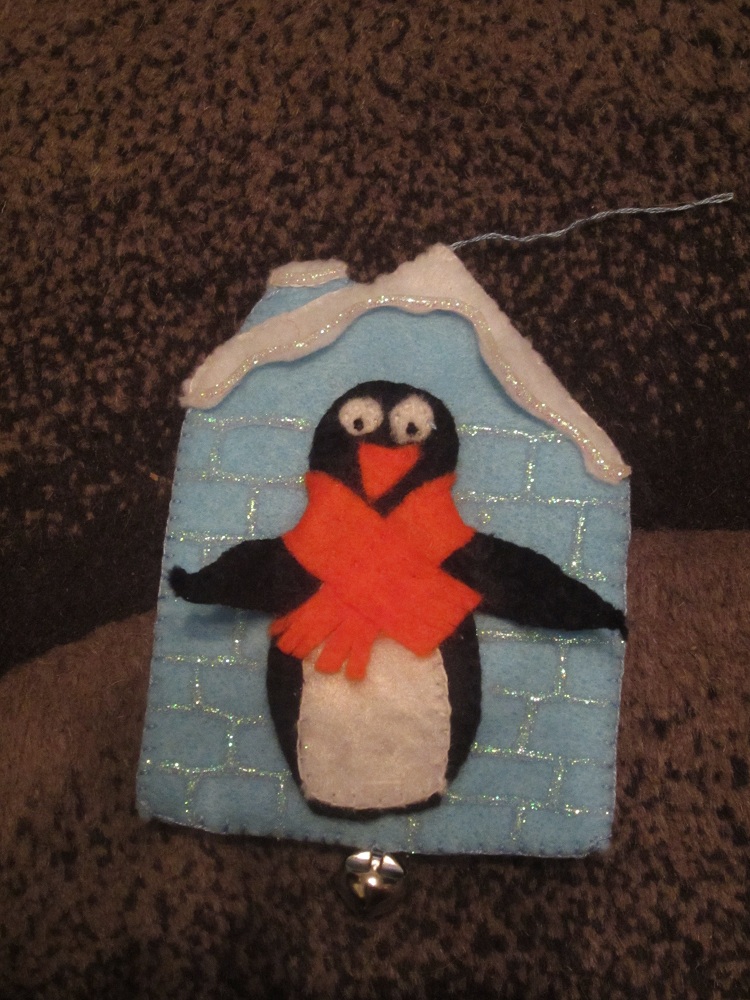
 The completed "Penguin" decoration
The completed "Gingerbread" decoration

I hope that you have enjoyed the Christmas crafts posted on my blog this week. I am currently running numerous Christmas crafts workshops for all ages from 5 -99 years. If you are interested in booking a session for your school, club or organisation please contact me on lisamart@hotmail.co.uk
Next week I will posted seven different ideas of Christmas crafts that you can do with children Keep posted.