Search This Blog

Welcome to my blog
Showing posts with label Creative Curriculum. Show all posts

Monday, 15 October 2012

Spooky Mobile


Here is the first in a series on Halloween, Bonfire Night and Autumn themed arts and crafts lesson plans to inspire a creative curriculum. I hope that you find them useful.

Brief Description:
Students will exercise their scissor-skills, learn a few things about balance,motion and movement whilst they create their own unique Autumn themed mobile.
Keywords:
Mobile, movement, Halloween (and word related such as ghost, witch, pumpkinetc), spooky, autumn, kinetic,
Alexander Calder
Materials Needed:
Paper, card, pencil, wool or thread, watercolours or felt tip pens,templates, cello tape and pipecleaners

Instructions:
The Hanuted house will make the main feature of the mobile. Ensure this is drawn on card or heavy weight paper
 1. On a piece of paper, plan out the design of your mobile. Think about what your theme is going to be and what objects, images etc you want hanging from the bottom of the mobile. For example you could choose to make a tree with lots of leaves hanging off the branches. These could all have a different words for Autumn written on them; or you could have your central piece as the horn of life with harvest festival items hanging from below. For the purposes of this worksheet I have chosen to work on a haunted house theme.
Sketch out your central piece using a pencil on a piece of card. For my mobile this will be a haunted house.
The children can be encouraged to drawn their own characters as I have above, alternatively you can google clip art to get ideas
2. Sketch out your objects that will be hanging from your central piece on a piece of card. I have chosen to use a witch, a bat and a ghost. You can have as many items hanging as you like but try to think about the balance of the piece and where they are going to hang. If you have a large shape on one side and a small shape on the other the mobile will hang crooked.
I have chosen to have a ghost, a bat and a witch for my mobile
3. For my mobile I have chosen to use water colour paints to add colour. There are lots of mediums you can use such as felt tip, coloured pencils, oil pastels, crayons and even collage materials – the choice is yours.
My witch on a broom stick will hang under the spooky house

I used watercolours to paint my house but you can use any medium
4. Once the pieces are all coloured cut them out ready for assemblage.On the back of all of the hanging items secure a piece of wool with some cello tape. You can staple these on but using cello tape leaves no marks on the front image of the mobile. Using a ruler find the centre point of your main piece (the house) and mark with a dot. Secure one of your hanging objects using cello tape where the dot is.
Cello tape the hanging piece to the back of the house
5. Once again using a ruler measure the distance between the centre of the main piece (the house) to the left edge. Half the distance and mark with a dot. Secure one of the remaining hanging piece to the spot you have marked with a dot. Repeat this process on the other side.
Completed Haunted House mobile
6. Finally add a piece of wool to the top to enable you to hang your mobile. Using cello tape secure the remaining two hanging piece to the dot marks you have made.

Differentiation:

Key stage 1: You can use pre cut shapes ortemplates for younger children to colour and cut out. This is a great activityto practice scissor skills, however if you are making a spooky themed mobilethe children can rip and tear the images out giving your rough edges – addingto the effect. Painted hand prints upside down with a pair of google eyes makeexcellent ghosts – give it a try.

Key stage 2: Why not extend the mobile by addingone of more layers to the hanging section? This can be done by cello tapinganother shape to the bottom of the shape above. Once again you have tocarefully think about weight distribution and balance. If you make one side toheavy the mobile will tilt. Instead of using string why not use pipecleaners toattach the hanging images. You can bend the pipecleaners into lots of differentpositions so the hanging images don’t all hang in the same direction.
Analternative method of adhering the hanging images to the central image could beto use a hole punch and tie the hanging images in place using wool.

Gifted and Talented: Think about the use of symmetry withthe mobile design. Imagine there is a mirror held in the centre on the image,both sides should look alike and mirror each other. You can make the sameshapes to hang each side with maybe a slight colour change. Consider colouringand working on both sides of the images so as the piece spins around presentinga 3D feel to the mobile.
Consideradditional impact such as cutting out the windows of the house, having a doorthat opens etc to create areas of interest to your mobile and make it standout.
This is an alternativeidea for the mobile.
Acrostic poem idea
Additional idea:
Why not use this mobile making activity as a creative writing tool?
 You could link this activity to a class project. I have mocked up a version of a mobile based on the theme of Autumn. I have drawn a wellington boot as the central image with a puddle underneath and my poem forming the splashes. I assembled my mobile using pipecleaners which allowed me to bend the pipecleaners to make it look like the boot was jumping in the puddle. I have then used the word “puddle” to make an acrostic poem, writing each word onto a separate piece of card. These pieces have been attached individually underneath the puddle. These look great as part of a wall display.

Saturday, 13 October 2012

Spooky Book Marks


Part three of my Halloween ideas brings you these stunning spooky bookmarks. Guaranteed to inspire children to pick up a book and put them to use.

Brief Description: What a great way to inspire young readers - create your own unique book mark. These cute bookmarks have been designed with an Autumn or Halloween theme, but these can be adapted to any theme. Intricate designs can take time to complete to  make this a full lesson or designs can be supplied to make this an extension activity. This activity can also be used for fund raising ideas for school fetes, with children making numerous bookmarks that can be sold to friends, parents, governors and stakeholders

Keywords: Book mark, design, flexibilty, shape
Materials needed; Paper, felt tip pens, watercolours, scissors, crimping scissors, ribbon, laminating pouch, laminator, glue, google eyes.

Instructions:
  1. Decide on the width of your book mark. I found that the average school class ruler is an ideal width. Using a pencil lay the ruler on a piece of paper and draw down both sides
Marked out and ready to add detail
  1. For my bookmarks I have made a “topper” for the top of the bookmark. Ask children to think about their design, connecting with the theme/project given. I have chosen a Halloween and Autumn theme for my bookmarks. Using the ruler as a marker, draw a further column. Draw the topper over the top of the column as illustrated in the picture to the right. Make sure the topper is slightly wider than the column- this will allow the topper to sit on the top of the book page.
Make sure that the images that are going to be placed at the top of the book marks slightly overlap the edges of your ruler marks

Back grounds drawn on ready for painting
 3. Colour in and cut out you book marks. I have used watercolour paints for my examples but you can use and drawing or painting medium for this project. I have also cut out the word “Boo” on my ghost bookmark for additional effect.
I have used water colour paint to add colour to my book marks

Paint your toppers before cutting them out, this marks it much easier - plus if you go over the edge you can cut it off
4. Mount the bookmarks on a piece of brightly coloured card. I have chosen to use a red piece of card to clash against my green bookmark. This will also highlight my cut out lettered “BOO”. Glue in position using a glue stick. When dry cut around the edge of the bookmark leaving a slight boarder. I used crimping scissors but you can use a rota trim, scissor to cut a wiggly line or even rip around the border for rough edges.
Cut out the backgrounds and toppers

Mount the bookmarks onto a piece of coloured paper

I have used crimping scissors to create an interesting edge
 5. Using sticky foam pads (or a piece of cardboard and some glue) adhere the topper to the top of the bookmark. If you want to make your bookmarks more robust, before you stick the topper on place the two parts, the bookmark and topper in a laminating pouch and laminate. You will need to cut them both out again and can still adhere the topper to the bookmark using sticky pads or a small piece of cardboard and glue.
Stick the topper on the top

6.For a final touch add a bit of ribbon to the bottom.
Add ribbon on the bottom for the finishing touches

Why not laminate the bookmark for added protection

Differentiation:
Key stage 1: There are lots of websites where you can get pre-printed bookmark designs that younger children can use and colour in (website address listed at the back of this pack). Alternatively you could encourage the children to use stencils and various collage materials on their bookmarks – using wool to create spider webs, stickers of themed subjects, you can even encourage the children to collect a leaf from outside place it under the piece of paper and rub over the top using a crayon to create a unique autumn leaf bookmark.

Keystage 2: Encourage the children to write a short poem on the back of their book mark that will compliment the design on the front. Rather than have just one topper on the bookmark, children could create a series of images to adhere to the bookmark. If the bookmark was a witches broom stick you could add a witch and one end, a cat in the middle and a spell book at the end. An autumn day could have an umbrella at the top, leaves and rain drops whirling around the centre and a pair of wellington boots at the base and so on and so forth.
Gifted and Talented: Think about the use of line, the idea of design and the method of technique in the medium used to apply colour. Ie. If the children are working in coloured pencil or pencil, look at the use of shading and range of colours that can be applied. If using collage materials are they appropriate for the image, do they enhance the piece? You could also encourage pupils to add an intricate border feature patterns, words or symbols related to the centre images, or even use a needle and thread and blanket stitch a border.

Furry Spider


Here is quick and simple idea that is ideal as an extension activity on a busy day or for an after school club.

Brief Description: This is a great little extension activity and if the whole class make one of these, this can create a stunning wall display. Children will use pipecleaners and pom poms to create this furry looking friend.

Keywords: Halloween (and words relating to) , Spider, twist, furry, texture
Materials Needed: Pipecleaners, fur or pom poms, PVA glue, google eyes other collage materials
Instructions:
  1. Decide what colour your spider is going to be. I have chosen grey and collected four pipecleaners and a scrap of faux fur. Alternatively you could use a pom pom.
Make sure you have everything you need prior to starting
 2. Using three of the pipecleaners, roll the pipecleaners in the fabric. Add a dab of pva glue at the end. If you are using a pom pom skip to the next step.


Add a dab of glue on the faux fur and role the pipecleaners up
 3. Using the remaining pipecleaner, wrap this around the centre of the fur bundle and twist close to the fabric. This will secure the pieces together. You can then fluff the fun to cover the join. If you are using a pom pom, lay three of the pipecleaners on the pom pom and use the fourth one to wrap around as above.
Wrap the pipecleaners around the faux fur or pom pom
 4. Bend the legs into the position required.
  
Legs all bent into position so the spider will stand
   5. Finally glue the eyes into positions and your spider is complete
I have chosen to add 4 eyes on my spider why not look up on line how many eyes a spider has?

The completed spider

 Differentiation:
Key stage 1: An alternative method of making the spider could be to twist the four pipecleaners together roughly in the centre. The children can then move the legs to the required positions. Try to encourage them to create shapes with the legs like a reverse letter “r” or a “L”. Children can glue either a piece of fur, pom pom or some wool on the top for the body part and finish with google eyes.
Keystage 2: Children can experiment more with pipecleaners by twisting two different colours together for the legs. This will make the spider more colourful and dynamic however this will make to joining of the pom pom slightly more difficult due to the added thickness of the pipecleaners. Children could try adding a pom pom or piece of fur on the end of each leg for a foot.
Gifted and Talented: Children can be asked to consider other materials that they can use or add to their spider, such as sequins, feathers, wool etc. Encourage the children to think very carefully about how these materials will enhance the spider rather than adding materials which could make the spider look busy. 

Friday, 9 December 2011

Teacher Training @ The Tate Modern

This week I was lucky enough to have the opportunity to take a group of teachers from local schools to the Tate Modern, at Southbank as a Professional Development day. The objective of the day was to provide staff with new and interesting ideas of activities that they can do with their pupils when visiting an art gallery and to provide ideas for projects that can be continued at school across the curriculum. Here is what we got up to....
Tate Modern, Southbank, London
As soon as we arrived I put the teachers straight to work. They were all tasked with drawing an outline of the building. This was used to document the day. Teachers were instructed to fill in their outline drawing with rubbings, drawings, words, artists names, quotes, collage receipts/pictures etc collected throughout the day, creating a visual documents of their day at Tate. These look great as an exciting and informative wall display back at school.
Our first activity actually inside the Tate was to select our favourite piece of work from the work in room 3, level 5 Energy and process. Participants were instructed to walk around the room, NOT to read the curators comments and respond to the piece. After each person had selected their piece, the curators comments were read to see if this changed our opinion or thoughts on a piece of work. Quite often we are daunted by "getting it wrong", when looking at art, but essentially art is about observing and responding. Some pieces will move you more than others and create a deeper connection for a whole range of reasons , you social upbringing, colour association, mood, what is going on in your life etc etc. This led onto the timeless discussion - What makes good art? This is a great discussion to have with children in a gallery space. You can observe how people look at art, do they stop, stare, walk by, stand at chat? Does everyone stop at the same pieces? How many people have the guide glued to their ear? Observing others observing art can be just as interesting and intriguing as the piece of art work itself.
A good discussion on this can be found at http://painting.about.com/cs/inspiration/a/goodart.htm
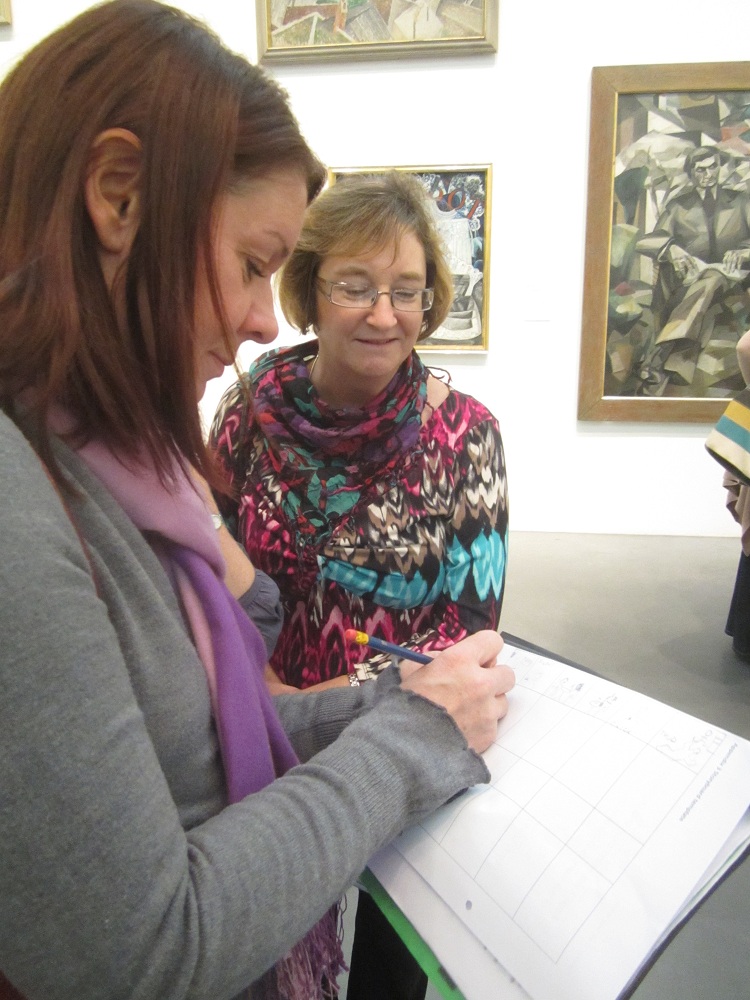
After our discussion, I asked each participant to draw their favourite piece from this room. We had now spent quite a bit of time in this room, looking at the works, discussing what we liked, what we didn't like and sharing viewpoints. We had spent time getting to know the works and taking time to look at them. I often see crowds of children dashing around the gallery trying to find a piece to draw and not actually spending any real time with the piece. This activity allows the group to focus on a specific room with limited pieces of work. It stops that overwhelming feeling that you can get when visiting a gallery such as the Tate with it's numerous floor, rooms and works. We seem to go into a state of panic, trying to view everything in one day - sometimes we should remember less is more. The objective of this activity was also to inform techers of how it feels to be that child tasked with drawing a piece of work in a public space. It can be unnerving and daunting as well as enjoyable and relaxing. Here the teachers are put in the position of the child.
Robert Morris born 1931Untitled

Susumu Koshimizu born 1944 From Surface to Surface


Giovanni Anselmo born 1934 Direction

Richard Tuttle born 19418th Paper Octagonal

Keith Sonnier born 1941 Red Flocked Wall

Gilberto Zorio born 1944 Terracotta Circle

Giuseppe Penone born 1947 Tree of 12 Metres

Mario Merz 1925-2003Lingotto

So what one was your Favourite? Why?
The next task was to incorporate the use of the senses when looking at art. This activity is a great way of engaging children in observing and discussing art within a gallery environment. It is also great fun for adults. Participants were instructed to work within groups, stand in front of a painting/sculpture and discuss what it tastes like or what it smells like. Not as bonkers as it sounds. Many a great artist has created work by what they hear, see, smell and taste when thinking about a subject. This is called Synesthesia - Which is a neurological based condition in which stimulation of one sensory or cognitive pathway leads to automatic, involuntary experiences in a second sensory or cognitive pathway e.g. seeing a letter or a number as a specific colour.
Have a go next time you visit a gallery, let your senses take over and see if you have a reaction. You could be stimulated by colours, images, a shape or a texture. It is a great way of spending time with a piece of art work and observing and discussing the piece with peers/friends.
Once we had smelt and tasted out pictures is was time to incorporate a bit of visual literacy. In groups, participants chose a picture and were tasked with creating a story using a simple storyboard format. Each group had to take into account what they could hear, smell, see, taste and touch within the piece as their starting point. Participants sketched their story working on the acronym S.P.I.C.E S=Setting, P=Plot, I=Ideas, C= Characters and E=Ending.
Only action words were allowed - no text just images. Once the groups completed their drawings I collected them in and swapped them around (I know how mean). Each group then had to interpret the drawings and write the story based on their interpretation of the pictures - Plus as a group they had to workout what picture they thought the story had been inspired by. This activity not only encourages creative writing, interpretation skills and active listening but creates a new dialogue around a piece of art work and once again presents an opportunity for participants to spend time with a piece of work, react, respond and record their viewpoints.


Drawing the story
"The Publisher" was a favourite amongst the group, with some of the ladies seeing him as a George Cloney-secret agent/assassin type of character. They smelt his aftershave, office aroma and even worked out he was wearing Calvin Klein's!
When visiting a gallery it is always worth doing a bit of research beforehand and to look at what activities and facilities the gallery has that you can utilise. A new activity that has recently be launched by Tate is Tate Trumps. Many of you will remember back to your childhood of spending many a fun afternoon playing top trumps, where the objective is to win all of your opponents cards by selecting a category and hoping your card has the best rating. Tate has launched an interactive version of this game that has three modes: Mood, Collection and Battle.
You can download it to your iPhone or iPod Touch for free, and then you're ready you roam the gallery looking for artworks you think will score highly in one of the three modes.
In Battle mode, you need to ask yourself the question, "If this artwork came to life, how good would it be in a fight?". In Mood mode, you're looking for artworks you think are menacing, exhilarating or absurd. Or, if you wish you had a gallery of your own, try Collector mode, and find pictures which are famous, recently produced or practical to house.
Once you've formed your collection, meet up with your friends, and play a fun game of trumps to see who did the best.
We played an adapted version of this game. Participants were given 30  minutes in room 2 level 3 Poetry and Dreams and asked to select 10 pieces of work that they think would win in their given mode. One group had battle and one group had collector. Children love this activity and it really works to spark their imagination. They have to consider all elements of the picture, the size and scale of the works, what materials they are made out of and in some cases the practicality of the piece. These may not be observations they would normally make when looking at a piece of work, but add in a bit of friendly competition and it is game on.
Why not have a go yourself - look at these two images - in a battle which one would win? Think about the paintings strength, size and agility of the image.

I hope that you have found this interesting and if you would like any more information of the activities discussed above and lesson plans please contact me on lisamart@hotmail.co.uk . I hope that this has inspired you whether you are a teacher, student, art fan or blog reader to be a bit more inventive and interactive with art work the next tie you visit a gallery - have fun

Friday, 25 November 2011

Children's Christmas Crafts no 5 - Christmas Weaving

Christmas wouldn't be Christmas without a bit of weaving. And that's exactly what Christmas craft No 5 brings to you. Children love weaving and using this technique to create all types of craft ideas from cards, to tags, to placemats and so forth. These ideas below can be made into lots of different crafts. If you use thin paper you can laminate your finished weaving and create placemats and coasters. This way they can be wiped clean and reused.

You will need card, patterned paper, glue, ribbon and embellishments
 Completed Christmas Weaving

1.     Select a weaving shape in the style of your choice or draw your own shape
2.     Now select your paper you are going to use to weave with. Think about what colours you want, complementary of contrasting. Cut a few strips of each colour. ( you can use anything to weave with including ribbon, bits of plastic, carrier bags, fabric, plastic cutlery, twigs – you can be as adventurous as you want)


3.     You need to make your slats to weave your paper through. You can do this using a craft knife and steal ruler. Carefully make out your slats using a pencil leaving about a 1 cm gap between each slat. Cut along the lines using a craft knife. Alternatively you can make the lines and fold the shape in half and use scissors to cut along the lines (this will leave a fold make in your shape)
4.     Staring from the back of your shape, weave a strip of paper over and under the cut slats. Secure the ends with glue at the back of the shape.

 First row completed


5.     Select your next strip and weave over and under the alternative slats in contrast to the first strip. This will give you a checker board effect. Continue this method until the shape is full.

6.     Make sure all the ends are securely glued down

7.     I have added glitter glue around the edge of my cracker for a bit of sparkle and attached a felt pre cut reindeer either end of the cracker. You could also tie ribbon around the ends, write messages on and embellish with sequins.


The picture above is from a Christmas crafts training session carried out at a local school - The picture shows a Christmas tree that has had pieces of paper weaved through. As you can see the tree has been painted using acrylic green paint and the member of staff has embellished the tree with buttons and glitter glue.

Something completely different tomorrow...